Here's a quick and hopefully easy guide on how to add pictures and links to the comments in the blog. The precess is a little longer than on some blogs so I have broken it down into simple steps. The first thing that you'll need to do in order to be able to add pictures, is register for a username.

Click on 'Register' to sign up for a free user name. If you alreadt have one, click Login and sign into your account.

To add a comment either click on the 'Add comment' button or 'Reply' to reply to an existing comment.
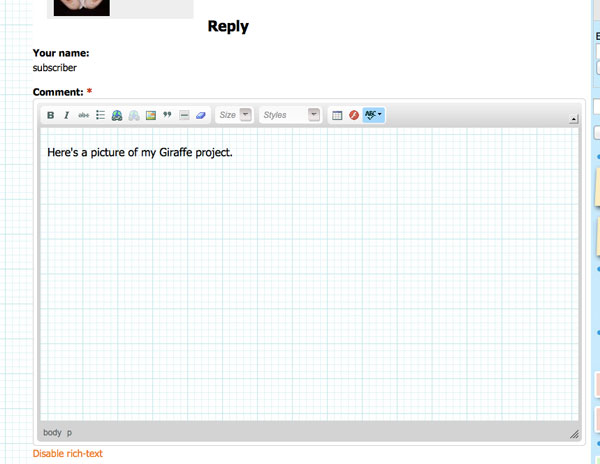
Type in the text of your comment in the comment window. Have your picture at the ready on your computer. Try to keep the picture size to below approx. 600 pixels and save it as a jpeg file.
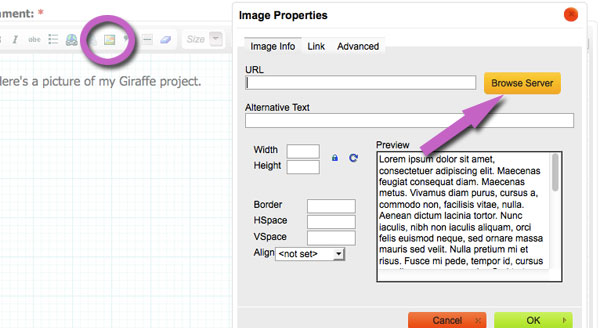
To add a picture, click on the 'Add Image' button, circled above, to open the 'Image Properties' window. Click on the 'Browse Server' button to open the 'File Browser'.
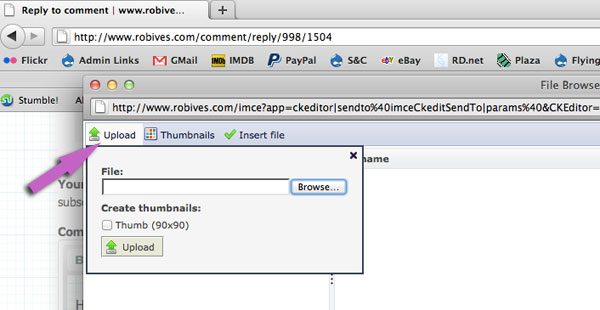
Click 'Upload' then 'Browse' to open the 'File Upload' window. Choose your file and click 'Open'
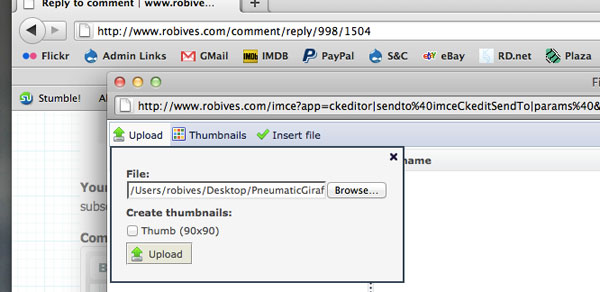
Click Upload.
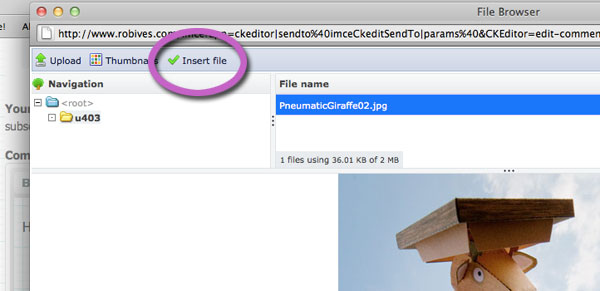
Click 'Insert file'
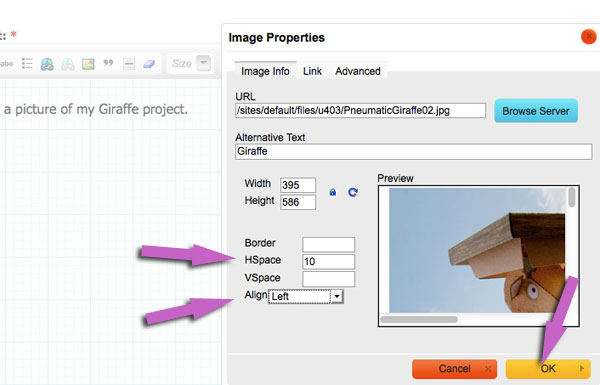
Before you add the picture to your comment you can make a few changes to the image properties. I tend to add a HSpace of 10 – this gives a space of 10 pixels on each side of the picture so that it is not butted right up against the text. (HSpace = Horizontal Space) Choose 'Align Left' to line the picture up to the left of the text.
Click OK. The picture should now appear in the text editing window.
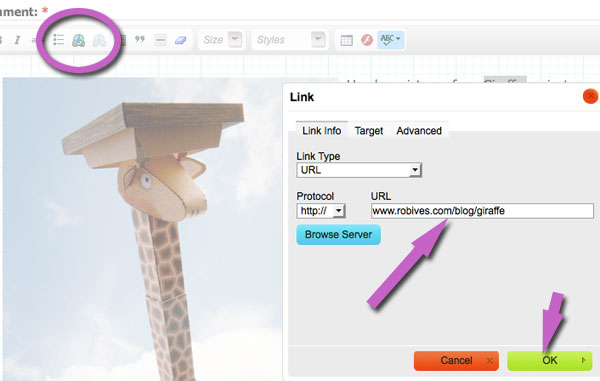
If you want to add a link to your text, select the text that you want to become a link then click on the Link icon (circled). Paste or type the web address you wish to link to into the URL box then click OK.
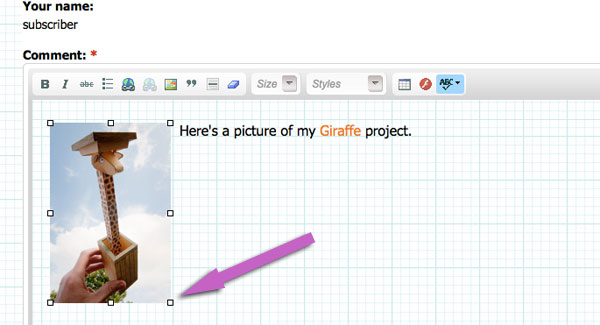
That's basically it. If you select the picture by clicking on it, eight small boxes will appear around the picture. Grab onto these by clicking and holding with your mouse and you can resize your picture. Once you are done, scroll down to the bottom of the page and click 'Save' to complete your comment. As long as you are logged in you can always come back and edit your comment.
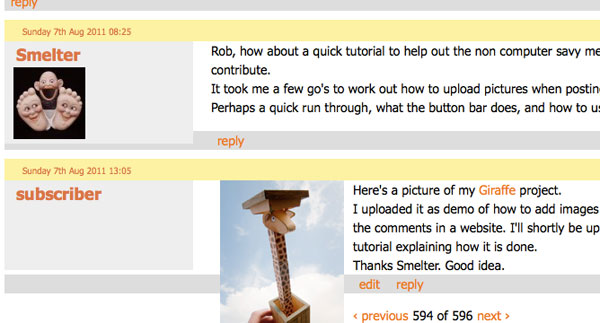
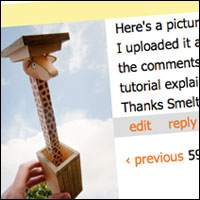
And here's what it looks like with link and picture.
I hope you found that useful. Feel free to try out the tutorial by posting pictures of your paper projects!

