
| This is a quick guide showing how the background texture featured in the Snow Man Gift Cover was created using PhotoShop. |
 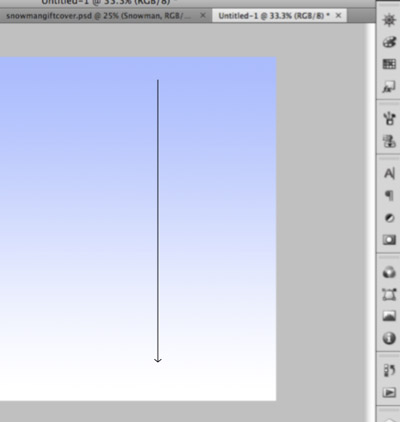 The main page background is based on a graduated fill. Select a light blue as the foreground colour. The main page background is based on a graduated fill. Select a light blue as the foreground colour.
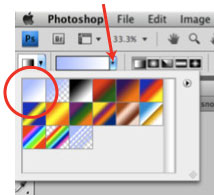
Click on the Graduated fill drop-down and select the, colour-to-white option. (ringed) Use the graduated fill tool to fill the background, blue at the top grading down to white. |
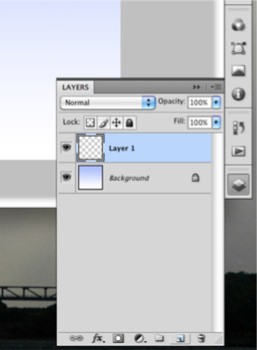 Create a new layer and fill it with 50% grey. Create a new layer and fill it with 50% grey. |
|
Set Distribution to Uniform and tick the Monochromatic box. |
|
Select Filter > Pixillated > Crystallize… The cell size controls the size of the particles, set it to approx 14, then click <OK> |
|
Select Filter > Blur > Motion Blur… Set the angle to 72 degrees. Set the distance to 295 pixels. Click the <OK> button. |
|
Click on Edit > Free Transform. Stretch out the picture so that it stretches slightly beyond the edge of the picture. Press the <Return> key to complete the transformation. |
|
Go to the layers palette, make sure that the top layer is still select. Drop the Opacity slider until it looks just right! I used 26%. That is basically the completed texture, and the end of the tutorial. The remaining elements of the cover sheet go on top of this layer. |
|
The colour is set by using the eye dropper tool to pick up orange colour from the Snowman's nose. |
|
Next tutorial I'll cover how I added the remaining text in Illustrator and finished off the sheet. |
 Make sure that the grey layer is selected. Click on Filter > Noise > Add Noise…
 The noise on the background is too fine, to make the particles of noise larger we'll deploy the Crystallize filter.
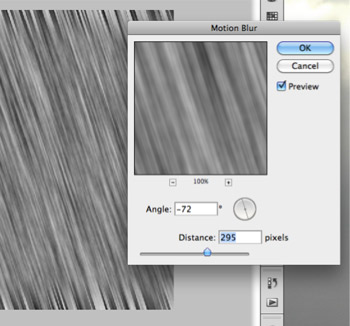 To convert the speckled background into a falling snow effect we'll use the motion blur tool.
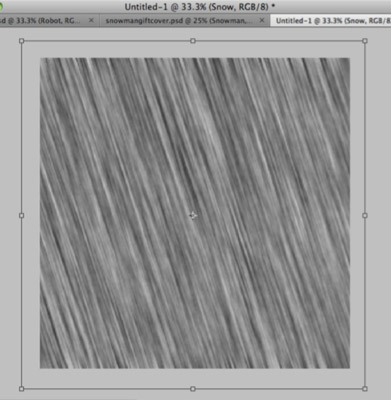 Notice that, in the previous picture, the edges of the motion blur look different from the middle. To even this out we'll expand the picture slightly so covering up edges.
 Now we'll fade out the snowfall effect so that it becomes a subtle streaking against the graduated fill.
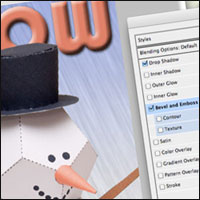
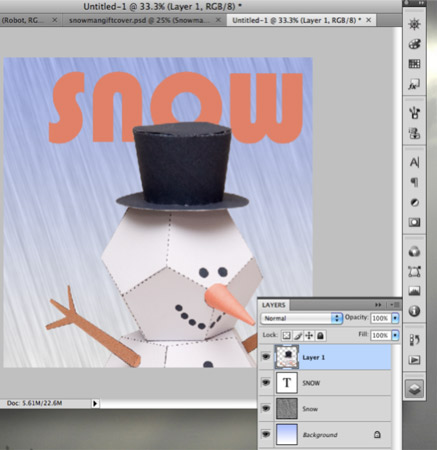 The next step in the creation of the cover is to drop the Snowman picture in on a new layer the add the title 'Snowman' the font here is Bauhaus 93.
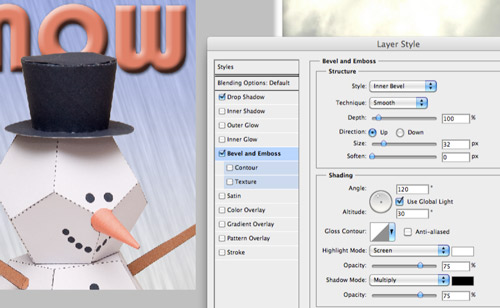 After which I added some effects for the text. In this case, a drop shadow and bevel.