This is a quick guide to creating animated gifs using Photoshop CS4. The animation here is used in Workshop notes to show how the blink mechanism of an upcoming model works. It was quite hard trying to track down how to create animated gifs in photoshop so I thought it would be worth recording the process here. I hope you find it useful.
I started with two photographs of the same object, one with the eyes open, one with them closed. I held the head as steady as possible between exposures so that I would be able to use the frames in a simple animation.
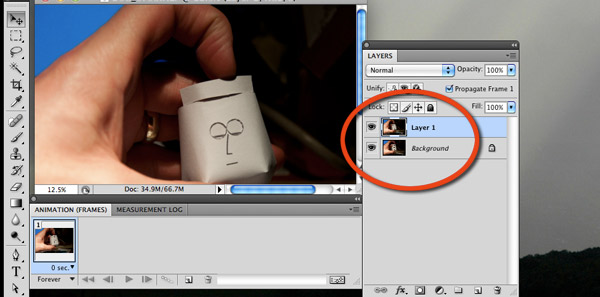
Add the two frames into one document in photoshop.
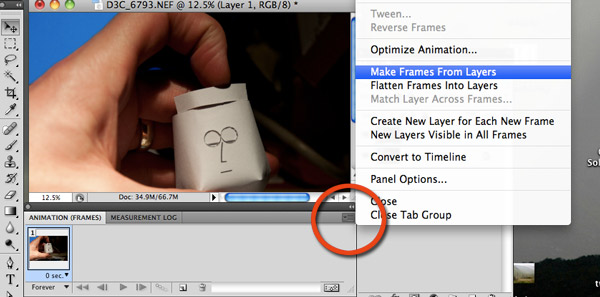
Make sure that the animation window is open. Windows -> Animations
Click the drop down on the top right hand corner of the animation window (circled) and click on Make Frames From Layers
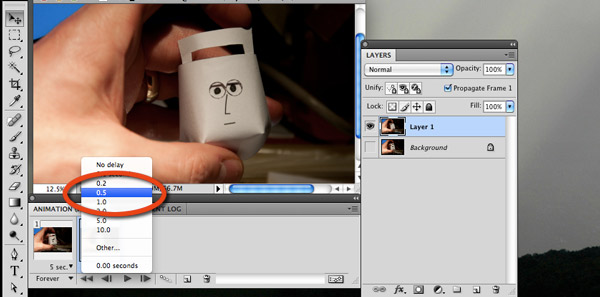
For each frame you can choose the length of time that it is displayed. I set this animation to 5 seconds for the eyes open frame and 0.5 seconds for the eyes closed. You can test the look of the animation at any time by clicking on the play button on the bottom of the animation window.
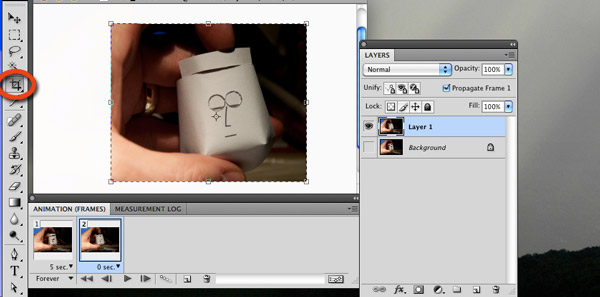
Having got the correct animation timing, it's time to crop the image to the right size.
Using the crop tool (circled) and select an area close to the subject. Check that the animation still looks okay then press enter to complete the crop.
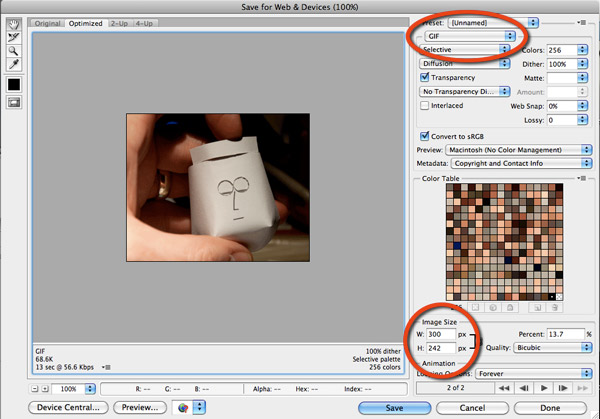
Time to save out the file as an animated gif. Click on File -> Save For Web & Devices set the file type to GIF (top circle) set the file size to the required size. I chose 300 pixels wide. Press enter to preview the actual size of the output and make any adjustments necessary. Notice that bottom left it tells you the size foe the resultant file.
Click save and give the file a name.
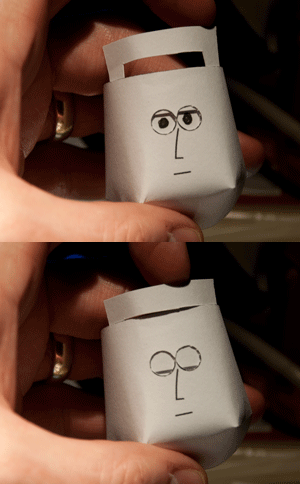 Here's the completed simple animation.
I use basically the same technique to create some of the animation of my paper models. I'll use eight frames and a camera on a tripod but the prinicipals are all the same.
Give it a go – send me you pictures – let me know what you think in the comments section.
Rob
